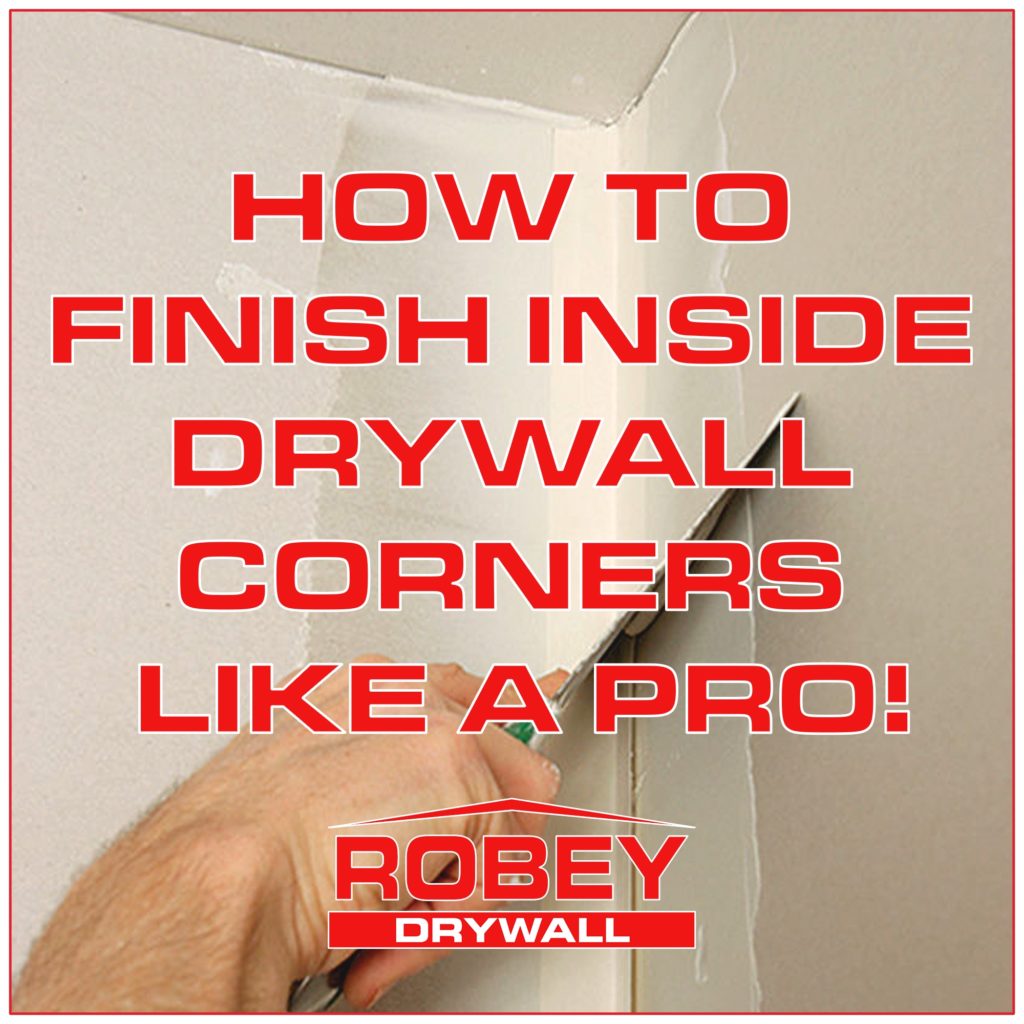
After you have finished hanging drywall, it’s time to begin the finishing process. That requires drywall tape material and a joint compound––known as mud––to tape the corners. Mudding is a crucial phase in the drywall process because it ties the walls together, improving the integrity of the entire structure and the building materials inside the drywall.
Required Tools and Supplies For Corner Taping
Make sure you have all the essential supplies before you begin drywall taping within corners.
- Drywall compound
- Drywall paper tape
- Putty Knife (4-inch)
- Mud pans for drywall compound
- Sander
- Mask
- Water
Optional Extra Equipment
While some may not need this equipment, having these extra supplies on hand can make cleanup simpler and easier to reach awkward areas while taping drywall.
Mix Your Mud
Make sure your mud is prepared before you start taping inside drywall. Most tapers use an all-purpose drywall compound and thin it with water. You can create mud by mixing joint compound and water in a mud pan or mixing joint compound and water in a bucket using a compound mixer. You want to keep it on the thinner side. It can be challenging to complete inner corners if the mud you’re trying to apply is too thick.
Now that your mud is all mixed, you’re ready to start taping seams. Although there are many different types of drywall tape when taping inside drywall corners, we recommend using 2’’ paper tape. Its non-adhesiveness and lack of elasticity are huge advantages over other tapes. That allows it to strengthen the seams in the drywall’s most vulnerable areas, the corners.
Just a reminder, working with drywall compound is a messy job. We guarantee you’ll have some on your clothes when finished. This is where having extra supplies comes into play. If you want to keep your clothes clean, wear coveralls or old clothing you’d use for dirty jobs because taping drywall is a messy process. Gloves are great to wear to keep your hands squeaky clean. And to keep your workspace tidy, place a canvas dropcloth or piece of plastic over the area where you are working. For those hard-to-reach areas. A ladder or step stool may be necessary.
Measure, Cut, Fold, & Repeat
One of the best methods to ensure drywall corners are finished strong and will last is applying mud to your corners and layering it with the paper drywall tape.
If you look at the paper drywall tape, you’ll notice that it already has an existing fold. Before you start applying it to the corners, you want to fold the tape in half, using the existing fold in the tape as a guide. This fold will help the drywall tape sit in the corner flush and “connect” the two drywall sheets together at the corner.
Quick steps:
– Unroll the paper drywall tape from the roll.
– Measure & cut the tape to length (floor to ceiling)
– Ensure the edges of the tape are square and straight.
– Fold drywall tape (90° bend)
– Start mudding and taping drywall corners.
Applying Mud To Corners
Mud mixed ✔️
Tape measured, cut, and folded ✔️
Now it’s time to start finishing your drywall corners. Grab your 4’’ putty knife and scoop some compound mud onto it. Starting at the top by the ceiling, apply the mud compound to one side of the corner. With the broad side of your knife, use long even strokes in a downward motion to move the layer of mud down one side of the corner. Repeat the process on the other side of the corner, creating one uniform layer that completely fills all the corner seams.
To maximize the corner’s strength and longevity, try to keep the mud compound’s thickness (⅛’’-¼’’) as consistent on both sides of the corners as possible.
Pro Tip: Just angle it a bit to prevent your knife from interfering with the mud on the opposite side of the corner.
It’s Time To Get Taping
Grab the tape you’ve already measured, cut, and folded; starting at the top of the corner, press the tape in the drywall mud. Don’t rush. You need to ensure the tape fold is set deep into the corner, half the tape is evenly on the side of the corner, and half the tape is evenly on the other side. Lightly run your 4’’ knife over the crease of the tape to set it into the mud. Then, run your 4’’ knife on each side of the corner.
Look for any imperfections like bumps, wrinkles, or air bubbles. You will want to lightly smooth out any spot you might see in your tape while the mud is still moist and hasn’t dried.
To easily remove any imperfection that might have occurred while setting the tape, start in the middle and move the knife to the outer edge, returning to the center of the tape and lightly smoothing it out in various directions. Just remember not to press too hard. You don’t want to thin out the layer of mud between the tape and drywall.
You want to ensure the mud and tape form a smooth line in the corner of the drywall without bumps, wrinkles, or bubbles.
Once you’re all finished, let the drywall mud compound dry overnight.
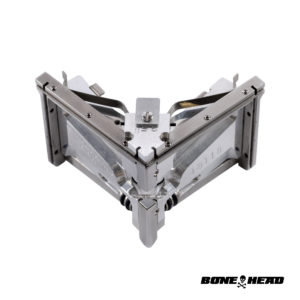
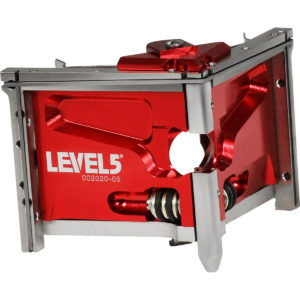
Pro Tip: For the edge between the wall and ceiling, pick up a 10-pack of 3-way Inside Drywall Corners. With their innovative design, anyone can finish a corner like a pro! Apply your tape layer on the bottom side of the corner first, and then add 3way at the top.
Extra Layer of Mud
Once the drywall mud compound has thoroughly dried, go back over it with your 4’’ knife and apply an additional layer to the corners. Like before, start on one side of the edge and then move to the other.
Unlike earlier, when you used long, even strokes to apply the mud compound, you want to use smooth short strokes here.
Don’t overdo it. Keep it even and remove any excess substance.
After you’ve applied the additional layer throughout the whole length of the edge, gently feather the edges so they blend smoothly into the drywall.
Let’s Get Sandin’
After the extra layer of mud compound has fully dried, you can begin to sand away any remaining roughness. Drop cloths are a great option. They can be used to cover furniture and help keep the dust inside your work area. If possible, moving or repositioning furniture and other items in the room is ideal to avoid them becoming dusty.
Caution- A lot of dust will be produced while sanding drywall. You should always protect your eyes, nose, and mouth by wearing safety glasses or goggles, and a mask to prevent inhaling dust.
Knowing how to finish inside drywall corners the first time properly will result in fewer imperfections down the road, limiting repairs needed and saving you time and money. Don’t rush. Take the time to finish each corner correctly.
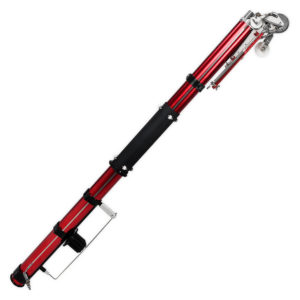
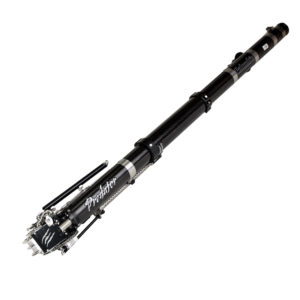
The Professional’s Helper- The Automatic Taper
If you’re going to hang stacks of drywall and finish it all on your own, we suggest either renting or even possibly purchasing a tool that all drywall professionals use to help speed up the process without reducing the quality, An Automatic Taper.
An extremely efficient tool in the drywall finishing process that applies both the tape and compound at the same time. Paired with a drywall angle head covering inside corners with a bed and finishing coat.
Below are a few of the best automatic tapers used by the top drywall professionals in the industry.